Thursday, March 29, 2012

pics of the pack

Daisy
Meet Daisy.  She our precocious six-year old (going on seven) Boston Terrir/Boxer mix.  She is, honestly, our sweet little girl provided she's not tired (can you say "Teenager!"). We're always amazed at how much personality dogs have and how expressive they can be with their face. She has a crooked tail (which the vet said was broken earlier in life - sad, I know, huge Gizmo ears, and the cutest underbite!  Anytime we walker or take her to the park or to PetSmart, she immediately becomes the center of attention and she loves it.  Daisy is definitely a premadonna! She has truly been a joy every day since we adopted her nearly five years ago!

Brewster
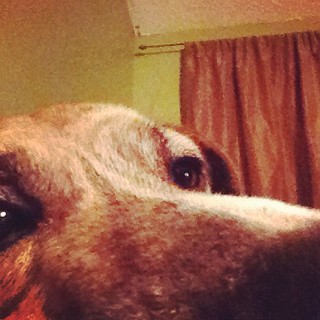
"Oh, hello, there!"  This is Brewster (or Brewster Bear as I call him).  When we moved into our house, we decided to get another dog.  We were wanting a smaller dog like Daisy (25 pounds) but fell in love with Brewster (who's 50 pounds) and our heart broke at his story.  He was two when we adopted him and had already been in four different homes.  Each time, he was taken back not due to regarding him but due to family circumstances.  He had some abandonment issues and we're pretty sure the previous owner was...well...not the nicest to him (they named him Rambo for goodness sake!).  He has had his moments but we stuck it through because we knew he would never get better if he was "returned".  A year later, I can say he is a fantastic dog...a lover, not a fighter...and we are so glad we persevered!  

These fantastic pics and biographies just to tell you that dogs, while an enormous responsibility, are a joy to have in a family.  Please, please, please consider adopting a pet rather than buying a pedigree animal from a store or breeder.  Many of these dogs are fantastic and only want a loving home to share.  Check through petfinder.com if you are looking for a dog or cat.  You will be surprised, also, at the amount of pedigree animals.  Most of all, if you do adopt, be sure to be patient.  Many have been in more than one home and it's going to take time for everyone to adjust!

Saturday, March 24, 2012

tomatoes, cucumbers, and squash, oh my!

We transplanted our tomatoes, cucumber, and squash plants today.  Last summer, we knew we were going to grow from seed in 2012 so we began saving plastic disposable cups rather than throwing them away.  Normally we use glasses we wash but when we entertain (which we do quite frequently), we use plastic cups to  save on work washing dishes afterwards AND we get reusable growing containers!!!  Some environmentalists might disagree, but it's a great idea to save time after parties or dinners and you save money by not purchasing containers separately.  We picked up a bulk package from Sams Club and started saving.

I began by taking a large nail and poking holes in the bottom of the cups for drainage.  After about...oh...24 cups worth of poking and stabbing my hand I had the bright idea of drilling holes.  I found the perfect drill bit in my tool chest (3/16"), attached it, and drilled six holes in a stack of cups.  The remaining cups went much quicker!

With the draining holds drilled, I filled them up 3/4 of the way with a good potting soil.  We purchased a miracle-grow variety.  While we could have made our own (and may do so in the future) it was both convenient and helps the plant since we bought a kind that has fertilizer in it.  This will help the plant grow before we transplant it outside, but also once we put it in the ground.  It will help them get a head start.  NOTE: make sure you use potting soil and not top soil or garden soil.  The latter two choices tend to compact as they dry which will make it difficult for new plants to develop a strong root system.

Cup...check.  Soil...check.  Next, we carefully pulled the netting off the pellets, making sure not to rip any roots that might have grown out.  After placing them in the center of a cup, we took some soil and put it around the plant, covering the plant to the top of the cup.  NOTE: if you are transplanting tomato plants, you can "bury" them up to their first set of true leaves (the first set of leaves that grow from the stem as opposed to the leaves that pop out of the seed).  If the stem of a tomato is buried (or is even in contact with soil) it will start to produce roots.  Burying the plant to the first true leaves allows the plant to develop an incredibly strong root system and withstand high winds (which are frequent in Southern Indiana).  I have not read any information as to whether one can do this with other plants.  If you have, please let me know!

Lastly, we lightly tamped the soil around the plant with our hands and put half a cup of warm water in it.  When we transplant into the garden, we'll water with a transplant nutrient additive which will help prevent any kind of transplant shock and will stimulate root growth.  I didn't do that this time since the plants.  I may try it next time and see if there is a noticeable difference.  Once they were watered, they were placed under our grow lights and left alone.

The whole thing was pretty easy, honestly, although time consuming since we have so many plants.  My father, who has lung cancer and worsening dementia, is staying with us right now while my mom recuperates from surgery.  I have to say that this project was very cathartic for me.  I was able to get away, throw on some music on the iPhone, and plug away with dirt and plants.  That may be one thing I love about gardening.  I am able to get away from the busyness that is life in the modern world, listen to some music (or just the birds and bugs), and plug away in creation and tending to garden life...even garden life in a semi-urban world.


Transplanting tomato seedlings

Saturday, March 10, 2012

no, i'm not growing weed. they are tomatoes, i promise!

Okay, okay, technically this is a picture of squash, cucumbers, lettuce, and cabbage. Two weeks after planting, and they are growing like mad.  I love planting seeds and waiting and watching in expectation of seeing growth. Some may say it's like watching grass grow, but I think it's much more exciting!


Starting to grow

Thursday, March 8, 2012

seeds coming up!

It's been about five days since I planted seeds.  We finally have our first plant breaking through and discovering the world it finds itself in.


First seedlings

Saturday, March 3, 2012

starting from seed

Two years ago we lived in a one-bedroom apartment. Not much gardening, but we had a patio. Boy, did we have a patio. We decided to plant a patio garden so we bought loads of pots and planters. We purchased tomato plants, bell pepper plants, zucchini plants, cucumber plants, and ancho plants. We started carrots, herbs, beans, and a few tomato/pepper plants from seed. It was a great experience and made for a spectacular patio that, honestly, was the talk of the complex with the management company coming by to take pictures. As with any patio garden, though, we weren't really able to feed ourselves from it.

Last year we purchased a house which had a yard. Finally, we had a yard! We painted and remodeled part of the house in February and March. In April, we worked on getting the back yard situated. In May, I began putting raised beds together and buying bags after bags after bags of soil and compost to fill the aforementioned raised beds. Finally, at the end of May, we were ready to plant. We didn't start our main crops from seed, though. We made trips to our local nursery and purchased dozens of plants - tomatoes, squash, zucchini, bell peppers, ancho peppers, and cucumbers. The rest (onions, beans, herbs, etc.) we started in the ground with seed. When the season was over and our harvest was, well, harvested, we looked at receipts and realized how much money we spent on plants. We didn't expect to lower our grocery budget enough to offset our startup expenses (wood, hardware, soil, and plants) but the amount of money spent on plants really hurt our ROI (Return on Investment).

This year, we opted to start everything (and I mean EVERYTHING!) from seed. Using convenient Jiffy pellets (available at your local nursery or big box retailer), hot water, and a chopstick, I set off planting tomatoes, squash, cukes, lettuce, cabbage, broccoli, brussel sprouts, and peppers. 144 pellets used. Now the adventure begins. A couple of tips to anyone wanting to start their own garden from seed (from what I've gathered from the interwebz and several books):

  • Buy quality seeds. The $.99 pack at Wally World might look attractive to the budget, but you'll get better seed by buying from a seed company (like Burpee, Gardens Alive, etc.) or your local nursery.  You may pay 2-3 times the price but you'll find you get MORE seed (which you can save for 2-3 years depending on the type) and that you'll better germination rates (which means you will use LESS seed in the long run).
  • Plant 20 - 50% more than you plan on putting out.  Even with the best seed, the germination rate is not 100%.  You will have seeds that won't sprout.  Also, not every seed that sprouts will survive.  Planting additional seeds will ensure that you have what you need...and if you have extra plants, you can plant them or give them away to friends (you know...encourage them to do some gardening and eat healthier at the same time!).
  • Keep your "plantings" warm until they begin sprouting.  It was cold here today and, while we plan on using grow lights in the garage once they sprout, they won't germinate unless they are between 65-80 degrees (depending on the seed).  A good place to put them is on top of the fridge.  It's usually nice and toasty up there and will help create a perfect environment for your future crops to begin their life cycle.
  • Make sure your containers are covered and that your pellets stay moist.  The Jiffy "greenhouses" have a top that we keep on them.  Not only does this keep the pellets moist, it also helps keep them warm.  Once they sprout and are as tall as the top, you can prop it open or even take it off and put it in the sun (if you are lucky to have a place inside with both good sunlight and storage for seedlings) or under growlights.
We will see how they begin growing over the next weeks and, hopefully, we'll put them out the first weekend in May!

Seeds

Seeds

Seeds